-
Open Modus Toolbox and Create fresh workspace: File – Switch Workspace (if not already in a new workspace)
-
Create new application: File – New – New ModusToolbox IDE Application
-
Scroll to the bottom and select: Custom Board, press Next
-
Find and select CY8C6347BZI-BLD53, next, finish
-
From one of our examples that can be downloaded here, lets say Hello World, copy the following files and folders: design.modus, cy8c6xx7_cm4_dual.ld, DemoKit (folder), OnethinxCore (folder) and paste them in your CustomApp_mainapp folder of the project you are building from scratch.
-
Replace the two files: OnethinxCore01.c and OnethinxCore01.h within your project with the latest files found on our GitHub: GitHub - onethinx/OnethinxCoreAPI
-
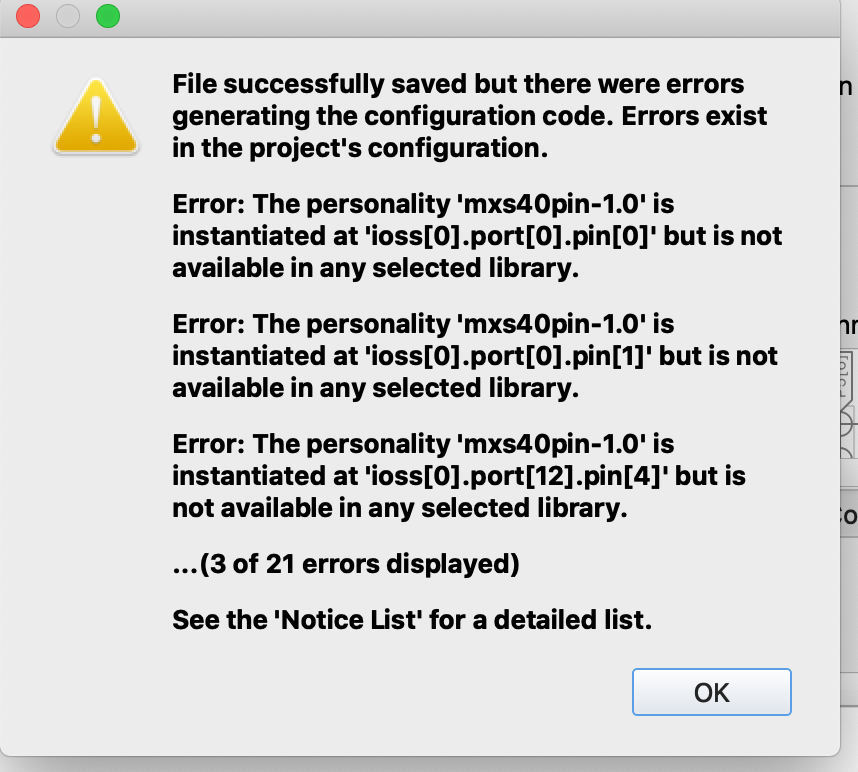
In ModusToolbox, double-click the file design.modus(found in the project explorer on the lefit). A window called Device Configurator will open. Go to: File > Save (yes). Exit the Device Configurator by pressinx X.
-
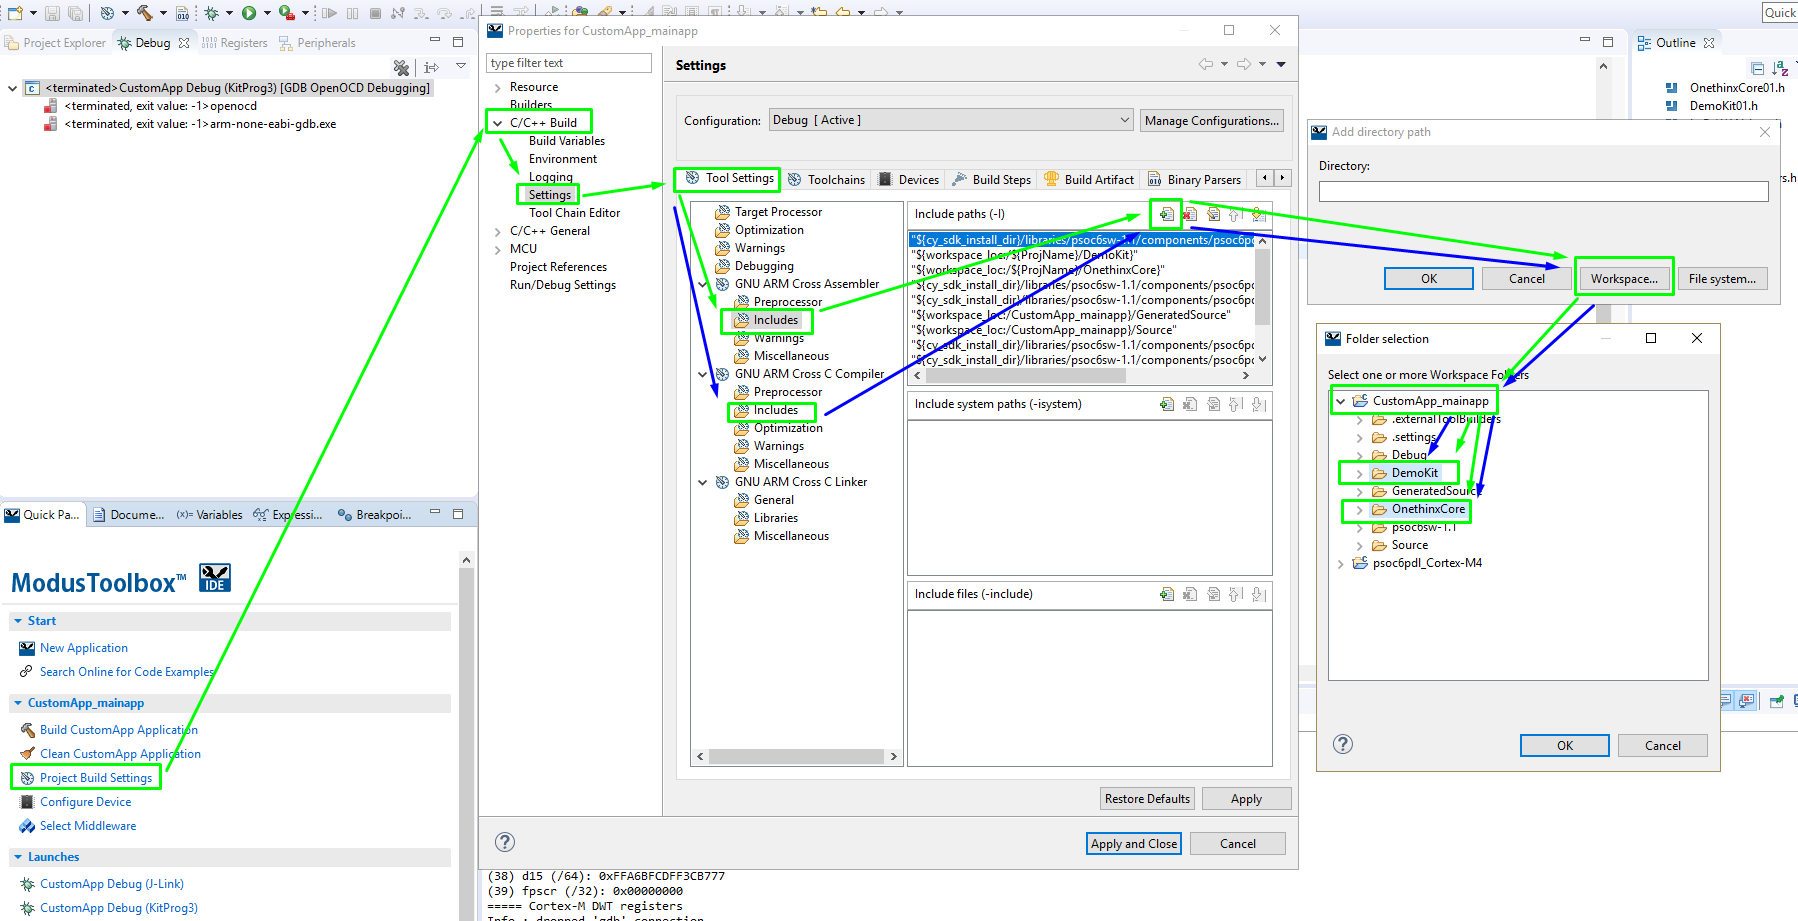
In the ModusToolbox (see image below), press Project Build Settings (in the left-bottom corner, under option “Clean”), a window should open which shows: Properties for CustomApp_mainapp (C/C++ Build, Settings, Tool Settings)
-
please select “Include” under the CNU ARM Cross Assembler, press the “Add…” icon (Icon with paper and green plus), press Workspace button, expand your CustomApp_mainapp folder and select folders DemoKit and OnethinxCore. Press OK and OK. (image above, green lines)
-
Repeat the step 7., but instead of “Includes” under GNU ARM Cross Assembler, select the “Includes” under GNU ARM Cross C Compiler. (image above, blue lines)
-
Press the button “Apply and Close”
-
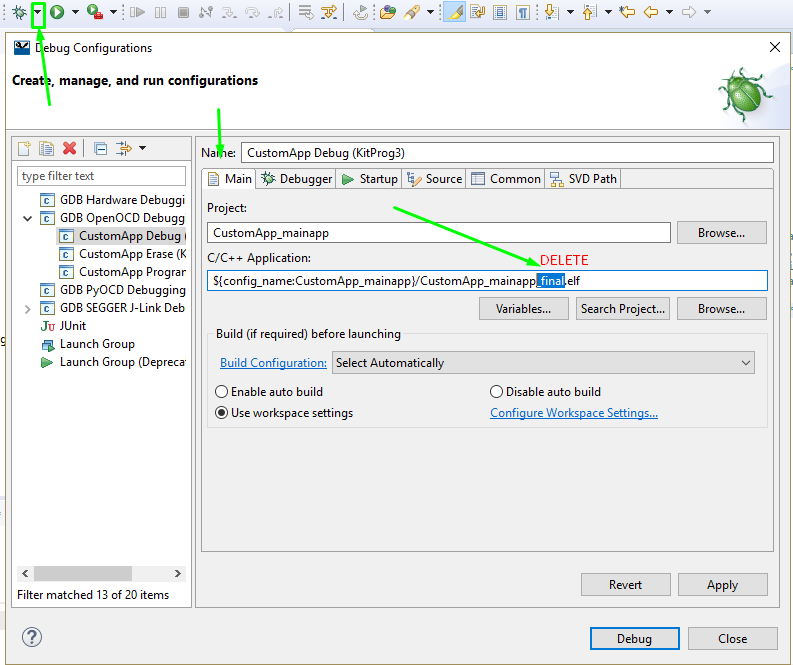
Press the little down triangle next to the “Debug” icon (as seen on the image above), press Debug Configuration and under GDB OpenOCD Debugging select “CustomApp” Debug (KitProg3).
-
Under tab main (see image above), in the textbox called C/C++ Application: delete the part “_final”. Press apply
-
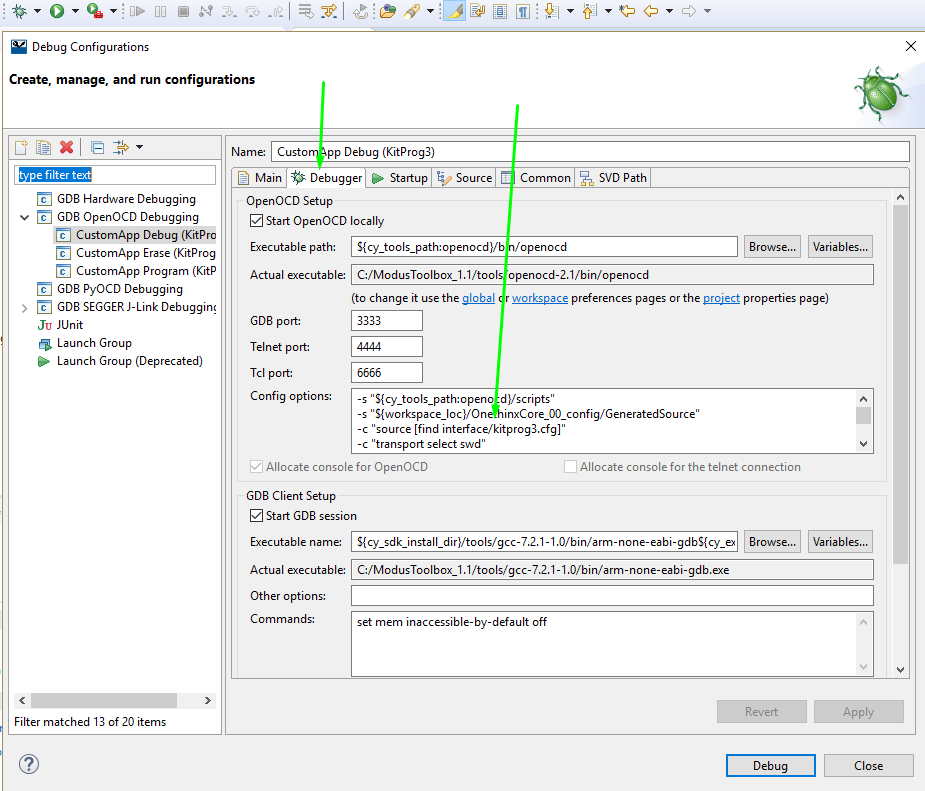
Under tab Debugger (image above), Under Config options copy and paste the following (replacing what was before):
-s "${cy_tools_path:openocd}/scripts"
-s "${workspace_loc}/OnethinxCore_00_config/GeneratedSource"
-c "source [find interface/kitprog3.cfg]"
-c "transport select swd"
-c "set ENABLE_CM0 0"
-c "set ENABLE_ACQUIRE 0"
-c "source [find target/psoc6.cfg]"
-c "puts stderr {Started by GNU MCU Eclipse}"
-c "init; reset init"
Press Apply, press Close
-
Please copy and paste the following includes (over the existing ones) in your main:
#include "OnethinxCore01.h"
#include "DemoKit01.h"
#include "LoRaWAN_keys.h"
#include "cy_pdl.h"
#include "cycfg.h"
if you get a warning (?): Invalid preprocessor directive #include… please revrite the quotation marks " "
- Write your code, Save, Clean, Buld, Debug, Enjoy (Follow the latest API reference in our datasheet and on GitHub)